Purpose
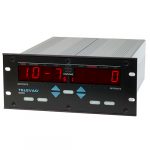
This application note explains the degas procedure for Televac® and ETI hot ion vacuum gauges (also called hot ionization vacuum gauges or hot filament vacuum gauges) when they’re used with the Televac® MM200 vacuum controller.
Relevant Televac® Products
This application note applies to the Televac® products listed:
| Description | Part Number |
| MM200 Vacuum Controller | 2-7900-20 |
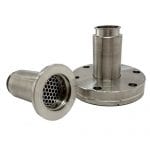
| 3F Mini Bayard-Alpert Hot Ionization Gauge | 345X-830X-XX |
Background
Hot ion vacuum gauges can be put into high voltage mode (called “degas” mode) which applies high voltage to the filament and bombards the grid with electrons, causing degassing and removal of contamination. This improves the performance of the vacuum gauge over its operating range.
How Often Should I Degas My Vacuum Gauge?
Short answer: Televac® recommends degassing your hot ion gauge at most once a month, and at least once every three months.
Long answer: As with almost everything related to vacuum measurement, the answer is “it depends”. The frequency for degassing is highly dependent on your unique process; in environments where more contamination is present, or for applications where you need to achieve UHV measurements (in the 10-10 and 10-11 Torr range), degassing should be done more frequently. For other environments and applications, it can be done less often.
But what is “frequent” or “often”? To answer this question, it’s important to note that degassing too frequently will cause the filament and grid to degrade, but failure to degas can impact the performance of the vacuum gauge and the accuracy of your vacuum measurements. This brings us back to our recommendation, which is that Televac® recommends degassing the gauge at most once a month, and at least once every three months.
Degassing can be done at regular intervals (like once a month), or you can use other methods to try to determine when the gauge needs to be degassed.
One method for determining if your hot ion gauge needs to be degassed is to compare it to a reference vacuum gauge. With the reference vacuum gauge and the hot ion gauge connected to the same vacuum system (physically as close to each other as possible), you can compare their readings to see if the hot ion gauge reading has drifted. Typical accuracy for a hot ion gauge is ±10%, so you’ll need to take that into consideration (this is explained in more detail below).
Many things can be used as a reference vacuum gauge, including another hot ion gauge, a cold cathode gauge, or a spinning rotor gauge (SRG). All of these different types of reference gauges have different accuracy specifications. As an example, let’s say that your reference vacuum gauge is also a hot ion gauge, we’ll call it Hot Ion Gauge 1, and we’ll call the gauge you’ve been using on your system Hot Ion Gauge 2.
You have both Hot Ion Gauge 1 and Hot Ion Gauge 2 installed on your vacuum system, you pump down, and you take the following readings:
Example 1
- Hot Ion Gauge 1 reading = 1.0E-6 Torr
- Taking the ±10% accuracy specification into account, your reading has a tolerance of 9.0E-7 to 1.1E-6 Torr
- Hot Ion Gauge 2 reading = 9.0E-7
- Taking the ±10% accuracy specification into account, your reading has a tolerance of 8.1E-7 to 9.9E-7 Torr
- Looks like you’re in good shape; no need to degas.
Example 2
- Hot Ion Gauge 1 reading = 1.0E-6 Torr
- Taking the ±10% accuracy specification into account, your reading has a tolerance of 9.0E-7 to 1.1E-6 Torr
- Hot Ion Gauge 2 reading = 1.0E-7 Torr
- Taking the ±10% accuracy specification into account, your reading has a tolerance of 9.0E-8 to 1.1E-7 Torr
- Those readings are out of tolerance; looks like it’s time to degas!
Degas Procedure
These only apply to the Televac® MM200 vacuum controller with Televac® and ETI hot ion gauges.
- Connect all relevant vacuum gauges to the vacuum system and connect the gauge cables to the MM200 controller.
- Power on the MM200.
- Pump the system down until the hot ion gauge is reading 1.0*10-5 or below.
- If the gauge is in “auto” mode, it will automatically be turned on when the rough vacuum gauge reaches 1*10-2 Torr (10 microns).
- If the gauge is in “self” mode, it will need to be turned on manually by following the standard turn on procedure.
- Press SETUP until the left screen says “0” and the right screen says “dGAS”.
- The left screen indicates the amount of time (in minutes) that the gauge will remain in degas mode.
- Use the left up and down arrows to increase or decrease the time.
- Televac® recommends degassing the gauge for 5 minutes.
- Press SETUP or TEST/OP until the unit returns to the measurement screen.
- The gauge is now degassing, and the remaining time (in minutes) will flash on the right screen.
Note that there are two filaments in the hot ion gauge, and the above procedure will degas whichever filament is selected. To change filaments, follow these steps:
- Press SETUP until the left screen says “FIL” and the right screen says “nbr1” or “nbr2”.
- Use the left up and down arrows to switch between “nbr1” and “nbr2” (filament number 1 and filament number 2).
- Press SETUP or TEST/OP until the unit returns to the measurement screen.
Related Products
• Customer configurable design
• RS-232/RS-485 digital communications
• Supports up to 8 relay set points
• Selectable units of measurement
3F Mini BA Hot Ion UHV Vacuum Gauge
• 10-10 to 10-2 Torr measurement range
• Two filaments for longer lifetime
• High accuracy measurement solution


